Issue 23, January 2002
Bite-Formed Posterior Composites
Dear Fellow Bondodontists,
Last year, 2001, was a year most of us would prefer to erase, at least in part. On Sept 11 Mary and I were in Perth, Western Australia, about to begin a seminar. When I reached outside our hotel room door to get the morning paper, I was greeted with headlines "America at War". Somehow we managed to do the seminar but I can tell you positively that the Aussies were as shocked as we were and all of us were quite distracted that day. A week later it was quite heartwarming to see flowers lining the steps of the American Consulate offices in Sydney, Australia.
We had actually planned a sabbatical time last fall, perhaps a fortuitous move. Our seminars were well attended and well received last year. We noted remarkable numbers of new attendees joining our "regulars". It sure is nice to be able to tell the newbies that they can seek reassurance from one of the regulars that the concepts taught do in fact work as stated. Several of our regulars mentioned, after missing a couple of years, how far behind they felt. Those comments gave me the idea to print here some of the seminar handout pages so that you can determine if you are current. I selected the day 1 series on posterior composite and from day 2, a new series on lab use of closed bite impressions. The wet field, even blood wet, stringless, H & H impression technique was a big hit this year. This is a concept taught to me by Jeff Hoos of Connecticut. The lab procedure given optimizes this technique. You can get the details of H&H at www.dentalexplorations.com, Jeff's web site.
Mary and I are increasingly booking seminar venues that are in very "civilized" locations. For example, New Zealand in May. New Zealand is one of our favorite places and quite a bargain these days due to the favorable exchange rate. (Mary, can we afford to go home?) Even the airfares to New Zealand are quite reasonable. There are two Hawaii venues in July, one in Princeville on Kauai and one in an almost secret bit of paradise, Ko Olina, near Honolulu. Both are world-class properties. The room rate we negotiated at Ko Olina is the best deal I have seen in a long time.
Also at Yosemite, one of our most popular venues, on November 7-9 we are very proud to present Dr. Gary Unterbrink of Austria. Gary is back by popular demand. He will be covering indirect restorations following his superb presentation on direct resins two years ago. If there ever was a guy who can think outside the box and back it up with science, this in the guy. Absolutely tops. Don't miss it. These Yosemite seminars attract many of the best dentists we know. It's a great place to relax and meet some of your finest colleagues, mostly top Bondodontists. Yosemite is great in all seasons (except perhaps in summer when it is too busy). We have a very civilized schedule, Thursday and Friday afternoons and Saturday morning. I suppose that is why we sometimes sell out as far as 6 months in advance!
Let's all look forward to a super 2002.
Sincerely,
Raymond L. Bertolotti DDS, PhD
Here is the current procedure for posterior composites, using the "bite-formed" technique. This is in the Day 1 seminar. At the end, there is a quiz to test your knowledge.
"Bite-Formed" Posterior Composites
(a product specific technique only for Clearfil SE Bond)
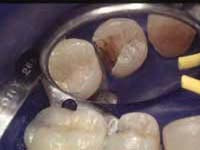
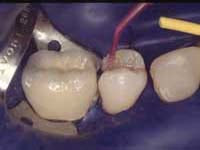
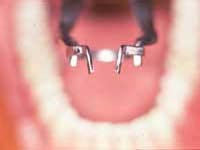
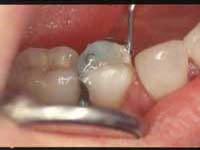
1. Cut conservative prep, using Caries Finder or Caries Detector to guide prep and caries removal. (Fig. 1)
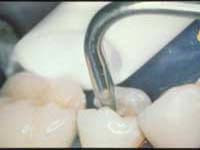
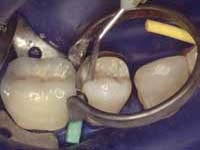
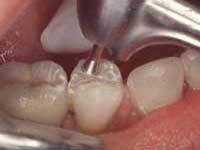
2. An optional but desirable step is to use air abrasion to clean and roughen the prep after caries removal. (Fig.2)
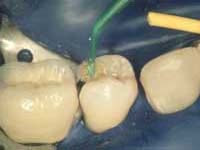
3. Apply SE Prime to dry or damp enamel and dentin for 20 seconds. This is a minimum time, longer is OK, agitation improves it. (Fig. 3) Take care to be sure that the occlusal margin remains wet with SE Prime.
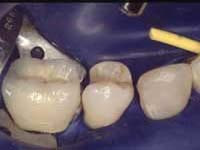
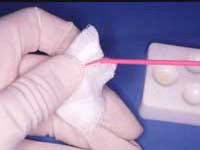
4. Air dry only (no wash). (Fig. 4)
5. Apply SE Bond (Fig. 5), "wicking" off excess with a dry Microbrush to avoid radiolucency (Fig.6).
5. Apply SE Bond (Fig. 5), "wicking" off excess with a dry Microbrush to avoid radiolucency (Fig.6).
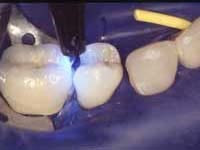
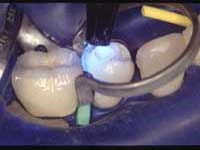
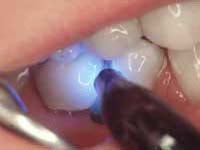
6. Light cure . (Fig. 7)
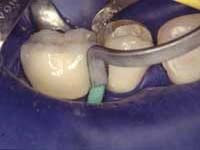
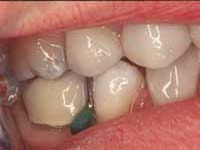
7. Place Danville long or short Contact matrix. Wedge if margin needs to be closed. It usually is best to invert the wedges, "apex down". When placed upward, the apex tends to distort the contour of the matrix. Check that centric occlusion is possible and adjust matrix height if necessary. If using a rubber dam, be sure matrix does not extend above marginal ridge to allow for CO closure (Fig. 8). Add the Danville Contact ring. The converging tines (Fig. 9) of the Danville ring allow placement above the wedge with good retention.
7. Place Danville long or short Contact matrix. Wedge if margin needs to be closed. It usually is best to invert the wedges, "apex down". When placed upward, the apex tends to distort the contour of the matrix. Check that centric occlusion is possible and adjust matrix height if necessary. If using a rubber dam, be sure matrix does not extend above marginal ridge to allow for CO closure (Fig. 8). Add the Danville Contact ring. The converging tines (Fig. 9) of the Danville ring allow placement above the wedge with good retention.
8. Apply a thin coat of light cure flowable composite (Starflow or Tetric Flow recommended) with needle tip to cervical margin. (Fig. 10) Light cure. (Fig. 11) Then add flowable composite to all dentin, and on the matrix up to near the contact. Light cure again.
9. The ring may be removed now or later, after the final composite increment is placed. The matrix has been stabilized by the flowable composite. Place light cure posterior composite (such as Heliomolar, Charisma, AP-X, Herculite, etc.) slightly overfilling, taking care to insure all margins are covered. (Fig. 12) (One increment will suffice after the cured flowable, except in very large or deep preps. Clearfil Photo Core is a nice intermediate material for big increments.) Do not cure yet.
9. The ring may be removed now or later, after the final composite increment is placed. The matrix has been stabilized by the flowable composite. Place light cure posterior composite (such as Heliomolar, Charisma, AP-X, Herculite, etc.) slightly overfilling, taking care to insure all margins are covered. (Fig. 12) (One increment will suffice after the cured flowable, except in very large or deep preps. Clearfil Photo Core is a nice intermediate material for big increments.) Do not cure yet.
10. Apply Danville Liquid Lens to the occlusal surface of the composite (an air block and separator). (Fig. 13)
11. Remove Contact ring (and rubber dam if one is used) if it was not already done.
12. Have patient bite into CO (Fig. 14), then open. While in CO, it is sometimes possible to trans-enamel cure from the buccal. (Fig. 15) The bite will establish the occlusion, leaving only composite flash.
11. Remove Contact ring (and rubber dam if one is used) if it was not already done.
12. Have patient bite into CO (Fig. 14), then open. While in CO, it is sometimes possible to trans-enamel cure from the buccal. (Fig. 15) The bite will establish the occlusion, leaving only composite flash.
13. Light cure from occlusal. A "soft start" with the curing light tip about 1 inch away decreases stress in the composite.
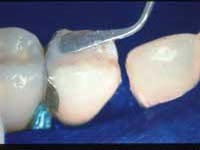
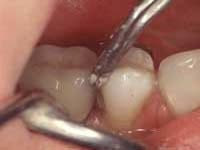
14. Remove the matrix band. It is often helpful to bend the matrix away from the composite before attempting to remove it. Normally a hemostat will be required to sufficiently grip the matrix. (Fig. 16)
15. Finish and polish. Very useful diamonds to define grooves are "Top Spin" diamonds that resembles an acorn amalgam burnisher (Fig. 17). For final polish, I prefer Astropol (Vivadent) cups and points.
16. Option: Etch occlusal with liquid (not gel) phosphoric acid, wash, dry, Fortify (Bisco), cure.
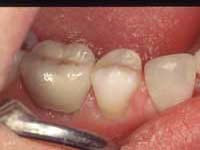
17. The restoration is now complete. (Fig. 18)
Test your understanding of the above:
While the above procedure works beautifully if you follow it cookbook style, here are a few questions (Q) to test your true knowledge. These answers (A) would be part of a typical program. (Answers follow questions, at end).
Q1. Why do you not air blow the SE Bond to thin it?
Q2. Can you use dual-cured Starfill 2B in place of the light cured Starflow?
Q3. How hard do you wedge?
Q4. Why do you show the wedge placed upside down, that is "apex down"?
A1. Air thinning tends to over-thin the SE Bond on the occlusal while not removing puddles deep in the prep. The overthinning reduces bond strength and the pooling leads to radiolucency.
A2. Starfill 2B works fine so long as you thoroughly cure through it to get light to the SE Bond. If you anticipate not being able to get light through the 2B, my recommendation is to abandon SE Bond and switch to the dual-curing version, known as Liner Bond 2V. Another possibility is to switch to total etch followed by MicroPrime and then dual-curing Photo Bond prior to the 2B.
A3. Sometimes not at all. If the matrix is closed at the gingival and you plan to use a low viscosity flowable composite, there is no need to wedge since Danville (as well as Palodent, but not the 3M/Garrison and Hawe-Neos) rings provide more than sufficient tooth separating forces.
A4. The apex is down so as to avoid disturbing the contour of the Contact Matrix. Remember that the Contact Ring separates the tooth, the wedge only serves to close the gingival margin. A large gutta-percha point will often close an open matrix without disturbing a contact.
Laboratory Procedures for Dual-Arch Impressions
The dual-arch impression technique is documented to work well. A recent paper reviews previous literature as well as validates a new impression material.
In my estimation, the real problem with utilization of the dual-arch technique is the laboratory treatment of the impression. Indeed the referenced paper prints comments received from technicians such as "Technician not keen on combined arch system" and " Time-consuming technique". These comments obviously signal a paradigm shift to an unknown technique. I offer the following method based on over 20 years experience with dual-arch impressions, thousands of them. It is faster and more accurate than any separate arch impression technique that I have ever utilized.
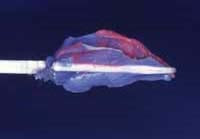
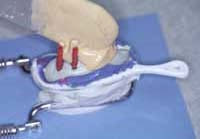
The most important point is that the opposing models be poured but not be separated from the closed bite impression (Fig. 19) before being mounted in an articulator. The objective is to utilize the bite registration as well as the impressions recorded on both sides of the tray.
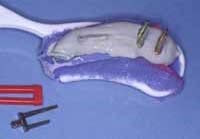
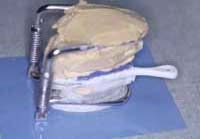
Sometimes I pour the impression myself so I can check the casts and sometimes I leave it all to the lab. I prefer to pour the prep side first (Fig. 20), dropping a "twin pin" into the stone, in alignment with the prep. I drop in two more twin pins in adjacent areas of the impression, parallel to the first pin, just in case I need to separate those parts of the model. (In the illustration, only one additional pin is shown since the prep tooth is the most distal tooth.) After the first pour sets, I pour the opposing side and mount the poured impression in the articulator with the same mix of stone (Fig. 21).
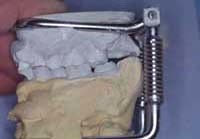
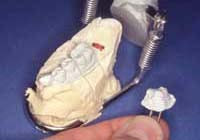
Finally, after the second mix sets, I close the articulator over the initial stone pour and pins (that initial stone surface having been lubed with hand soap as a separator) and make the final stone pour (the yellow stone in the illustration) (fig 22). Note that the two casts have not yet been removed from the impression - this is the key to accuracy in bite registration (fig 23). Now that the case is mounted in the articulator, I use a die saw to cut the pinned cast and lift out the pin die (fig 24).
If the lab separately pours each side and then attempts to re-use the impression to articulate the casts, articulation errors occur frequently. The usual result is "high" occlusion since the casts have not been fully reseated. (If your lab work arrives with remnants of sticky wax or if the impression is cut into a "bite registration", the chances are your lab does not understand the concept of closed bite articulation.)
Some labs are further concerned that the impression in a rimless tray is too flexible and will distort upon pouring with stone. If this is a concern, just support the impression on a wadded up paper towel for support during the initial pour. Years of experience have shown that this supposed distortion is not a problem.
Disposable metal closed bite trays (such as Temrex and Clinician's Choice) should be avoided since the metal, unlike plastic, often permanently distorts during removal of the first pour casts and thereby distorts the impression which precludes accurate second pours.
I suggest these lab supplies: Twin pins with Sleeve (cat #177-5889) and chrome spring articulator (cat# 356-8982), Zahn Dental. Zahn Dental is the laboratory branch of Sullivan-Schein, USA.
Reference
1. Burke FJT and Crisp RJ. A practice-based assessment of the handling of a fast-setting polyvinyl siloxaine impression material used with the dual arch tray technique. Quintessence Int 2001;32:805-810.
Proper Use of Die Spacer Prevents Sensitivity!
Now that we have captured the information in the impression, let's look at another lab problem. That is the use of block out materials on the occlusal floor of the die. I learned about this one from Dr. Gary Unterbrink, the speaker scheduled for Yosemite this November. (Don't miss Gary, this will be one of our very best seminars.)
Let's recall that all composites shrink during polymerization. Shrinkage occurs toward the best (strongest) bonded surface; in most cases this surface is the restoration rather than the tooth. The more the composite thickness, the more the stress placed on the bonds by the shrinking composite. It follows that the use of block out on the occlusal floor could result in a sealed-in space adjacent to the pulpal floor, the area where the bond is most easily broken. We already know that a similar sealed-in space is the source of post-op sensitivity to bite pressure for direct posterior composites. We must avoid this sealed-in space since bite pressure would hydraulically move fluid in dentinal tubules intersecting this space. The remedy is to have indirect restorations "bottom out" on the pulpal floor.
Gary Unterbrink correctly places highest priority on the gingival margin since that is a frequent source of clinical failure. No spacer is used in the gingival area. Note that several layers of spacer are placed on the vertical walls up to and over the occlusal margin.
Again, as with closed bite impression technique, we need to work closely with the labs. It will take a bit of convincing to get the lab to assure bottoming out of the inlay/onlay even if quality of the occlusal margin is compromised.
