Issue 24, January 2003
Zero Invasion Dentistry
Dear Fellow Bondodontists,
Wow, time flies when you are having fun! It has been a year since I printed the last newsletter edition. In 2002, Mary and I did a lot of international travel, both for our seminars and to obtain current information for those seminars. The international demand for "bondodontics" lectures has been quite astonishing. So here is the next newsletter issue, a bit later than I intended. Hopefully it will serve as an update as well as an indicator of your currency in the concepts I am teaching.
I do not seem to be slowing down any in my schedule, contrary to previous plans. We are very proud to continue bringing you guest lecturers who are among the best in the world, the ones I personally want to hear. The next one will be at Yosemite, featuring Dr. David Winkler from London, one of Europe's best. Sadly this will be our last Yosemite seminar; the new Yosemite Concession Company is not group friendly and has become unreasonable in their reservation policies.
We have also announced our third Alaska cruise, this one departing Vancouver (a great destination in itself) on June 1 and arriving at Seward, just south of Anchorage, a week later. (Marie Cameron, our travel agent for many years, has secured some very good cruise rates. She can be reached for cruise information at (510) 276-1190.) Besides many excellent stops, we cruise Hubbard Glacier, the ship captain's favorite. This cruise features guest speakers Tom Orent (the Gems Guy) and Tom Hughes (famous for those smile books). The seminar will be a blend of esthetic dentistry and marketing of that dentistry.
Our schedule this year will be a one day format. This one day format on Contemporary Bondodontics is my favorite and is getting excellent reviews. Note the very civilized venues, like Santa Fe and Darwin. Also to be noted is the guest program at Tahoe with John Kanca and yours truly, a sort of "battle of the bonds". That is on June 21 and should be a great one.
Have a great year.
Sincerely,
Ray
H & H Impressions
I am grateful to Jeff Hoos of Connecticut for telling me about this technique. Jeff is a "must hear" for his daylong program, which includes a remarkable story on how he discovered the H&H technique. H&H stands for hydraulic and hydrophobic. You use hydraulics to push a hydrophobic impression material. The hydrophobic material is a polyvinyl siloxaine (VPS) capable of displacing blood and saliva. When done properly, there is no need for retraction string (nor for some overpriced and under performing syringable clay). H&H seems to be very atraumatic to the gingival tissues. Jeff helped develop J Morita's PerfectimTM VPS materials for this technique; likewise I helped dial-in Danville's materials for the technique. What I wanted was a blazing fast set, a very hard "moose-like VPS", a thixotropic character to the wash (non-runny but very easily movable, sort of like whipped cream), and a very dark color for easy margin reading. So what we have are two very capable but different systems; it might be a good idea to try both. (Tin Man sells both, (800) 554-6394. They even have the appropriate Danville materials assembled into a custom H&H "trial kit" and they can also supply suitable and inexpensive trays.) The tray "moose" needs to be quite hard; Danville's StarTM VPS Stiff Bite is the hardest I have seen. Actually the hardness is more properly described by the Shore A Durometer measurement. The Shore A Durometer instrument consists of a blunt-pointed indenter attached by a lever to a scale that is graduated from 0 to 100 units. A reading of 0 indicates the indenter has completely penetrated the sample; a reading of 100 units indicates no penetration has occurred. Danville's Stiff Bite has a value about 91, quite impressive by industry comparison. Likewise the wash should have a low durometer reading in addition to the above-mentioned handling properties. If you want to use other than Danville or J Morita materials, check that the durometer reading is above about 88 for the moose, below 40 for the wash. The more the difference, at least in theory, the better. In my estimation, all VPS materials are sufficiently hydrophobic to repel the fluids, even those labeled "super hydrophilic".
Here is the technique but don't even think of using it without informing your lab. The lab must use die spacing as is described below, otherwise you will have crowns that are too tight to seat and you will be among the 20% of naysayers. They should also be informed about the best method to record the occlusion provided by the closed bite impression (see below).
Here is the technique but don't even think of using it without informing your lab. The lab must use die spacing as is described below, otherwise you will have crowns that are too tight to seat and you will be among the 20% of naysayers. They should also be informed about the best method to record the occlusion provided by the closed bite impression (see below).
The H&H (hydraulic and hydrophobic) technique:
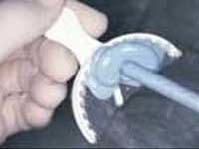
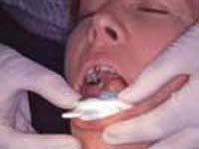
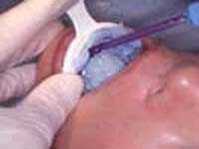
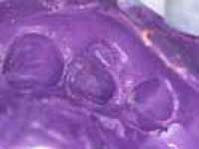
Stiff Bite VPS is injected onto a plastic rimless tray (Fig. 1). Blood is displaced so there is no need to wash it off. The patient closes into the Stiff Bite VPS, which forms a "peripherally sealed custom tray" around the prep area. (I use the rimless plastic trays like Dentamerica's to deliver the impression material to the mouth.) After the Stiff Bite sets, the patient opens while your fingers retain the impression on the opposing arch (Fig. 2). It is important that the tray remain in the mouth, not yet removed. Removal and re-seating is prone to re-seating errors. The impression surface is spray washed and dried while in the mouth. Using an auto mix tip, First Quarter Light VPS is syringed onto the Stiff Bite VPS in the prep areas and adjacent areas (Fig. 3). There is no need to syringe Light VPS directly onto the teeth; that procedure tends to trap bubbles. The patient closes fully and forcefully, thereby exerting hydraulic force on the Light impression material. The Light flows and follows the path of least resistance, first flowing subgingivally since the periphery is sealed by the Stiff Bite. Typically the Light flows even past the margins (Fig. 4). The excess then flows out the periphery. Again, blood is displaced form the teeth so there is no need to wash it off! It is ideal to hold your hand on the patient's chin and masseter muscle while the Light polymerizes to avoid patient movement. After the initial forceful closure, the closure need not be forceful but it must be steady. If you are using First Quarter Light, the patient can open in 1 min, 30 sec. You have the impression.
Stiff Bite VPS is injected onto a plastic rimless tray (Fig. 1). Blood is displaced so there is no need to wash it off. The patient closes into the Stiff Bite VPS, which forms a "peripherally sealed custom tray" around the prep area. (I use the rimless plastic trays like Dentamerica's to deliver the impression material to the mouth.) After the Stiff Bite sets, the patient opens while your fingers retain the impression on the opposing arch (Fig. 2). It is important that the tray remain in the mouth, not yet removed. Removal and re-seating is prone to re-seating errors. The impression surface is spray washed and dried while in the mouth. Using an auto mix tip, First Quarter Light VPS is syringed onto the Stiff Bite VPS in the prep areas and adjacent areas (Fig. 3). There is no need to syringe Light VPS directly onto the teeth; that procedure tends to trap bubbles. The patient closes fully and forcefully, thereby exerting hydraulic force on the Light impression material. The Light flows and follows the path of least resistance, first flowing subgingivally since the periphery is sealed by the Stiff Bite. Typically the Light flows even past the margins (Fig. 4). The excess then flows out the periphery. Again, blood is displaced form the teeth so there is no need to wash it off! It is ideal to hold your hand on the patient's chin and masseter muscle while the Light polymerizes to avoid patient movement. After the initial forceful closure, the closure need not be forceful but it must be steady. If you are using First Quarter Light, the patient can open in 1 min, 30 sec. You have the impression.
Now a word of warning: There is a small percentage of dentists who simply can't get the H&H technique to work. There is a large percentage who say that it is the best and most accurate technique ever (I am in that group). Proper die spacing is the critical difference; you need about 40 microns in the area backed by the Stiff Bite, that is the supragingival areas. I presume that the Light wash elastically displaces the Stiff Bite and when the impression is removed from the mouth, an elastic rebound occurs to create an undersized die. In the subgingival margin areas, there seems to be no need for die spacing since presumably there is no significant elastic distortion in that area. Therefore the 40 microns of die spacer is used on the die in the areas corresponding to the Stiff Bite backing and away from the margins. J Morita's PerfectimTM removable die spacer seems ideal for this application. It can be removed from the die after the crown is completed and the margins of the restoration checked on the die.
Since I don't want die spacers applied to margin areas, I reserve H&H for subgingival margin impressions. (For supragingival margins, simultaneous use of First Quarter Monophase on the tray and First Quarter Light on the tooth, the Light dispensed thru Danville's exclusive needle on an automix tip, will give you the same blazing speed and accuracy.)
Some problems that lead to bad results are worth mentioning: not forming enough Stiff Bite around the prep (Stiff Bite must have rigidity to resist the elastic distortion of the Light wash); use of VPS putty (its durometer reading is too low) rather than Stiff Bite; and undetected patient movement during the closed bite. However, the most common problem is improper die spacing.
Now this may seem obvious but apparently not to at least one: never use Stiff Bite in a rigid metal tray; such a hard and stiff VPS can lock into undercuts! Also note that H&H is strictly a closed bite technique. Severe undercuts (such as a bridge) should be blocked out; I often use Surgident Periphery wax to accomplish the blockout.
Laboratory Procedures for Closed-Bite Impressions
Unfortunately dental labs often have problems dealing with closed bite impressions, whether or not they are taken with the H&H technique. A recent Quintessence paper reads: "Technician not keen on combined arch system", "required time consuming adjustments" , and "time-consuming technique" (Quintessence Inter 2001; 32:805-810). These comments signal a resistance to using an unfamiliar laboratory procedure. For this reason, I have posted complete lab instructions in the previous newsletter edition. See Newsletter, Issue 23, New Year 2002.
First Composite Increment: Flowable Composite
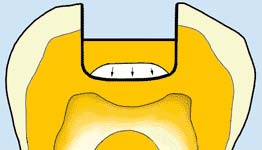
Use of flowable composite as a first increment has become an almost standard procedure. Hannu Laamanen and yours truly published the technique in 1999 (Quintessence Int 1999; 30:419-422). We found that flowable composite adapts to the preparation far better than condensable composites, a "sure-fail" proposition. I prefer to use a low viscosity, "runny", flowable composite such as Starflow or Tetric Flow for the first increment of composite. (Starflow is stronger, Tetric Flow is more radiopaque.) Low viscosity helps assure a well-adapted first increment. It is known that all composites "shrink toward the best bonded surface". If the only bonded surface is the gingival margin, it's obvious what the composite shrinks toward (Fig. 5). Many lecturers have expressed concern that flowable composites shrink too much compared to conventional composites. This is only half of the pertinent story. The other half is elastic modulus, usually ignored. Basically what should concern us is the stress placed on the composite to tooth interface as a result of polymerization shrinkage. Stress is determined by the shrinkage multiplied by the elastic modulus, known as Hooke's Law. Fortunately with flowable composite the elastic modulus goes down as the shrinkage percentage goes up, about equalizing the bond stresses for conventional and flowable composites. In other words, increased polymerization shrinkage is irrelevant to interface integrity! Now let's consider a real problem encountered in use of low viscosity flowables, bubbles.
Bubbles in the flowable composite?
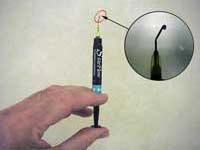
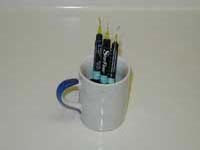
Bubbles in a flowable composite primarily result from air originating in the needle tip. Air in the needle can "float" on the composite if the syringe is placed horizontally. Think of what happens when a bottle of wine turned on its side. The solution is to push out the air (Fig. 6) before allowing it to float in the syringe. Storing the syringes vertically is a further safeguard to prevent the air from entering the syringe (Fig. 7). (Thanks to Tom Hughes, our guest speaker on the Cruise, for that idea. )
Post / Core -Bonded Throughout
While there are many methods and materials that can be used for bonded post and core, here is my most frequently used procedure. This is a popular topic in the seminars these days.
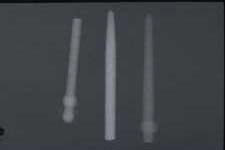
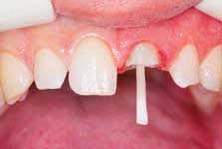
It is my belief that the post should have a tapered cross section to gradually dissipate stress. Additionally a taper prevents the hydraulic forces that can result from blunt-end posts inserted into viscous resin, causing root blowouts. I want the radiopacity to be as high as possible (Fig. 8). I want the elastic bending to mimic that of dentin but the lengthwise stiffness to be greater than dentin. In other words, I want it to bend but not stretch. There should be no stress raising notches or slots. These properties best describe Carbotech's Snowpost, a pre-silanated, zirconia-silica fiber post (Fig. 9). It is marketed by Danville in the USA and Canada. In Fig 8, Snowpost is shown in the center along with two competition posts. Note the blunt end on the post to the left and low radiopacity in the tapered post to the right.
The dedicated Snowpost reamers are slightly oversized so the reamer, marked with a silicone endo ring for length, can be the "try-in post", preventing contamination of the actual Snowpost's silanated surface. Here is the procedure based on using Snowpost.
Loose fitting post
Tight fitting post
Further helpful hints
Tempting as it seems for its tremendous bond strength, use extreme caution in selecting SE Bond for use in canals since it is a light cure only and you can not light cure it well in the canal. Even if you can light cure it, it is NOT compatible with self-cure core pastes (contrary to what CRA says, in my opinion.) SE is compatible with light curing Photo Core, so you may use SE Bond if you are positive that light will fully penetrate the Photo Core to reach all of the SE Bond. It is NOT sufficient to cure the SE Bond before you place the Photo Core, light must penetrate all the way to the SE Bond through the Photo Core. (The explanation, too long to print here, is in the current seminars.) There is some interesting research in Italy that shows Photo Core in a canal can be cured by light curing down a light transmitting post. If you want to try that technique, Danville's SnowLIGHT post would be a logical choice. SnowLIGHT has an epoxy bonder rather than Snowposts' composite. Otherwise the posts are similar.
- Etch the canal with liquid phosphoric etchant (gel is too difficult to wash out).
- Wash with water, preferably using a blunt needle endo syringe.
- Dry with air and perhaps paper points. (Need not be bone dry if you use Photo Bond in the next step.)
- Place Clearfil Photo Bond in the canal, a small or mini Microbrush is a handy delivery tool. There is no need to light cure the Photo Bond since it is dual cure and cures fine in the dark in about 5 minutes. Air thin the Photo Bond or remove excess with a paper point.
- Mix and place Starfill 2B (a runny, dual cure composite) into the canal with a Centrix needle tip.
- Coat the Snowpost with Photo Bond and insert it into the canal. You should have at least 1 minute working time to insert the post.
- Wait for the Starfill 2B to self cure for optimal shrinkage, around 2 minutes (this is not critical), and then light cure the post area after the 2B jels.
- Clearfil Photo Core makes a very nice buildup; just sculpt it against the 2B and the post, and then light cure. Photo Core will cure at least 7 mm deep with a good light in 30 seconds time. If you choose to use DenMat's Core Paste or Clearfil self-cure Core rather than Photo Core, they are compatible with all the previously placed materials. For speed, I prefer the Photo Core.
- Prep after the core material has cured.
Tight fitting post
- Etch the canal with liquid phosphoric etchant (gel is too difficult to wash out).
- Wash with water, preferably using a blunt needle endo syringe.
- Dry with air and perhaps paper points. (Need not be bone dry if you use Photo Bond in the next step.)
- Place Clearfil Photo Bond in the canal, a small or mini Microbrush is a handy delivery tool. There is no need to light cure the Photo Bond since it is dual cure and cures fine in the dark in about 5 minutes. Air thin the Photo Bond or remove excess with a paper point. Use of Photo Bond rather than ED Primer will allow a far greater working time for the next step, Panavia F.
- Mix and place Panavia F (a thin, dual curing composite adhesive) into the canal with a Centrix needle tip.
- Coat the Snowpost with Photo Bond and insert it into the Panavia F filled canal. You should have at least 1 minute working time. Some Panavia F should extrude, insuring complete fill.
- Wait for the Panavia F to cure some for optimal shrinkage (this is not critical), and then light cure the post area.
- Now proceed to build the core as in step 8 above.
Further helpful hints
Tempting as it seems for its tremendous bond strength, use extreme caution in selecting SE Bond for use in canals since it is a light cure only and you can not light cure it well in the canal. Even if you can light cure it, it is NOT compatible with self-cure core pastes (contrary to what CRA says, in my opinion.) SE is compatible with light curing Photo Core, so you may use SE Bond if you are positive that light will fully penetrate the Photo Core to reach all of the SE Bond. It is NOT sufficient to cure the SE Bond before you place the Photo Core, light must penetrate all the way to the SE Bond through the Photo Core. (The explanation, too long to print here, is in the current seminars.) There is some interesting research in Italy that shows Photo Core in a canal can be cured by light curing down a light transmitting post. If you want to try that technique, Danville's SnowLIGHT post would be a logical choice. SnowLIGHT has an epoxy bonder rather than Snowposts' composite. Otherwise the posts are similar.
Bonded Matrix Bands?
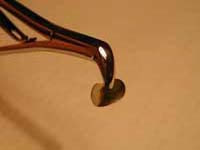
One problem with Clearfil bonds, my favorites, is that they all adhere to metal matrix bands, making their removal difficult. Don't even think about burnishing the band or worse, sandblasting the band surface. If you do you will have created a new class of stainless steel reinforced composite! Thankfully there is a new tool to greatly facilitate matrix removal: the MegaGrip forcep (Fig. 10). It sure makes the competitive products look and feel wimpy! MegaGrip can be ordered from any Danville dealer such as Tin Man (800) 554-6394.
Think Adhesion!
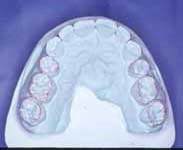
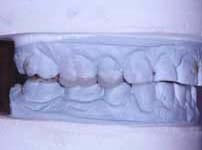
The following case nicely illustrates what adhesion can do to conserve tooth structure. I calculate that retention from 1 mm2 of bonded surface is equivalent to about 3-4 mm of cemented crown ferrule. Recognizing the potential of adhesion, this case was restored with zero invasion, I utilized pure adhesion to restore vertical dimension. The lab marking of the margins on the casts are shown below (Fig 11).
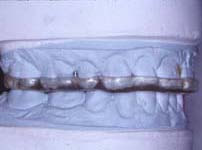
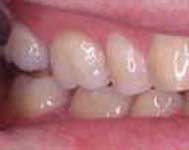
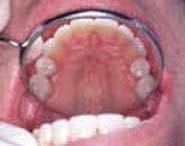
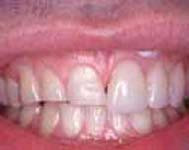
The vertical dimension was first tested with a hard splint (Fig. 12). Gold was bonded to the 2nd molars, the rest were restored with feldspathic porcelain on the anteriors and IPS Empress on the posteriors (Fig. 13, 14 and 15). Excellent esthetics in the anterior region was achieved with minimally invasive preps (Fig. 16 and 17).
We have learned that incompletely seated restorations are the sole cause of bite pressure sensitivity. I will quote Gary Unterbrink (our last guest speaker): "If the prep has retention form, it is probably wrong!" What Gary is talking about is the potential space created under a restoration when it does not fully seat. It is clear that creating a prep without retention form would help preclude incomplete seating. The composite bonding agent shrinks during polymerization, bringing the restoration closer to the tooth, rather than creating an internal gap.
DIAGNOdent False Positives
Special thanks to Dennis Mihalka for this tip. Apparently certain green prophy pastes such as Nupro can cause a DIAGNOdent reading. I will quote Dennis: " One can smear the finest film (not seen with human eye) on a paper tray cover and it will still read very high. If by chance Nupro mint is used, I do not even bother to use the DIAGNOdent. It will cause you to believe cavities exist and will waste an appointment or worse, waste a virgin tooth."
Suspecting problems related to products with green color, I looked at Caries Finder G (green) and to learn exactly what a trace of the green does to the DIAGNOdent readings. Even when it was washed off both healthy enamel and dentin, I got false positive DIAGNOdent readings. This needs some further investigation so for now, be cautious in using DIAGNOdent and any green colored dental product.
Suspecting problems related to products with green color, I looked at Caries Finder G (green) and to learn exactly what a trace of the green does to the DIAGNOdent readings. Even when it was washed off both healthy enamel and dentin, I got false positive DIAGNOdent readings. This needs some further investigation so for now, be cautious in using DIAGNOdent and any green colored dental product.
